How to Cook Pancakes in the Oven
How to Cook Pancakes in the Oven: Tray Method with Time and Temperature Guide

When people think of pancakes, they usually picture a stack sizzling on a hot skillet. But I’ve learned that baking pancakes in the oven—especially using the tray method—is one of the most underrated and efficient ways to prepare them. This method isn’t just about convenience; it offers consistent texture, hands-off cooking, and less mess. For home cooks who want to simplify breakfast or prep for a group, baking pancakes in the oven is a game-changer.
- Why Bake Pancakes in the Oven Instead of Frying?
- How Oven Heat Affects Pancake Batter Differently Than a Skillet
- Tray Baking vs. Muffin Tins vs. Sheet Pancakes: What’s Best?
- Choosing the Right Equipment for Oven-Baked Pancakes
- Essential Ingredients for Oven Pancakes and Why Proportions Matter
- Step-by-Step Recipe for Oven-Baked Pancakes Using Tray Method
- Temperature and Timing Chart for Different Oven Styles and Tray Types
- How to Get a Golden Top Without Flipping in the Oven
- Baking Pancakes in a Conventional Oven vs. Convection Oven
- How to Adapt This Method for a Microwave, Pressure Cooker, or Skillet
- Common Mistakes When Baking Pancakes in the Oven
- Flavoring Tips: Spices, Zests, and Extracts that Work Best Baked
- Sauces and Toppings That Pair Well with Oven Pancakes
- Variations: Vegan, Gluten-Free, Fruit-Filled, and Savory Versions
- How to Store and Reheat Oven-Baked Pancakes Without Drying Them Out
- Building Your Own Oven Pancake Routine: Timing, Variations, and Planning Ahead
- FAQ: Oven-Baked Pancakes — Chef Answers Your Most Common Questions
Why Bake Pancakes in the Oven Instead of Frying?
I first turned to this method during busy brunch service in a small kitchen. I needed to cook large batches quickly, without babysitting every pancake on the stove. Once I tested the tray method, I realized it allowed for even cooking, reliable structure, and excellent results with fewer steps. You don’t need to worry about flipping, uneven browning, or pancakes going cold while you make more. Everything bakes at once—and comes out uniform in height, texture, and color.
In this guide, I’ll walk you through every step of the oven-baking process: which trays to use, how to mix the batter, how to control temperature, and how to achieve that golden top without flipping. I’ll also compare it to other methods and share professional tips I’ve learned after making hundreds of batches this way. If you’re new to oven pancakes, you’re in the right place—and you might never go back to the skillet again.
How Oven Heat Affects Pancake Batter Differently Than a Skillet
Baking pancakes in the oven isn’t just about changing equipment—it’s about working with a completely different kind of heat. Unlike a skillet, which uses direct heat from below, an oven surrounds your batter with dry, circulating heat. That changes the way pancakes rise, brown, and set. Understanding these differences is key to making them successfully.
In a skillet, the bottom cooks quickly, creating a crisp base while the top slowly sets. You flip to finish the second side. In the oven, the heat surrounds the tray evenly, so the batter rises all at once. There’s no direct bottom crust unless the pan is preheated or heavily greased. Instead, you get a uniformly baked texture—almost like a hybrid between a cake and a pancake.
Oven-baked pancakes rely more on steam and even temperature to rise. That’s why a good baking powder ratio and proper batter thickness are so important. The absence of flipping means you also have to think ahead about the top color and finish. I’ll teach you how to get that golden top even in an oven—without drying it out.
So while the base ingredients remain the same, the behavior of the batter changes in the oven. I’ve adjusted my recipes specifically for this environment, and once you learn the differences, you’ll find it much easier to get consistent, soft, and fully cooked results—every single time.
Tray Baking vs. Muffin Tins vs. Sheet Pancakes: What’s Best?
Over the years, I’ve tested almost every oven pancake method—from muffin tins to cookie trays to large sheet pans. Each has its own strengths, and depending on your goal (individual portions, batch cooking, or just speed), one may suit you better than the others.
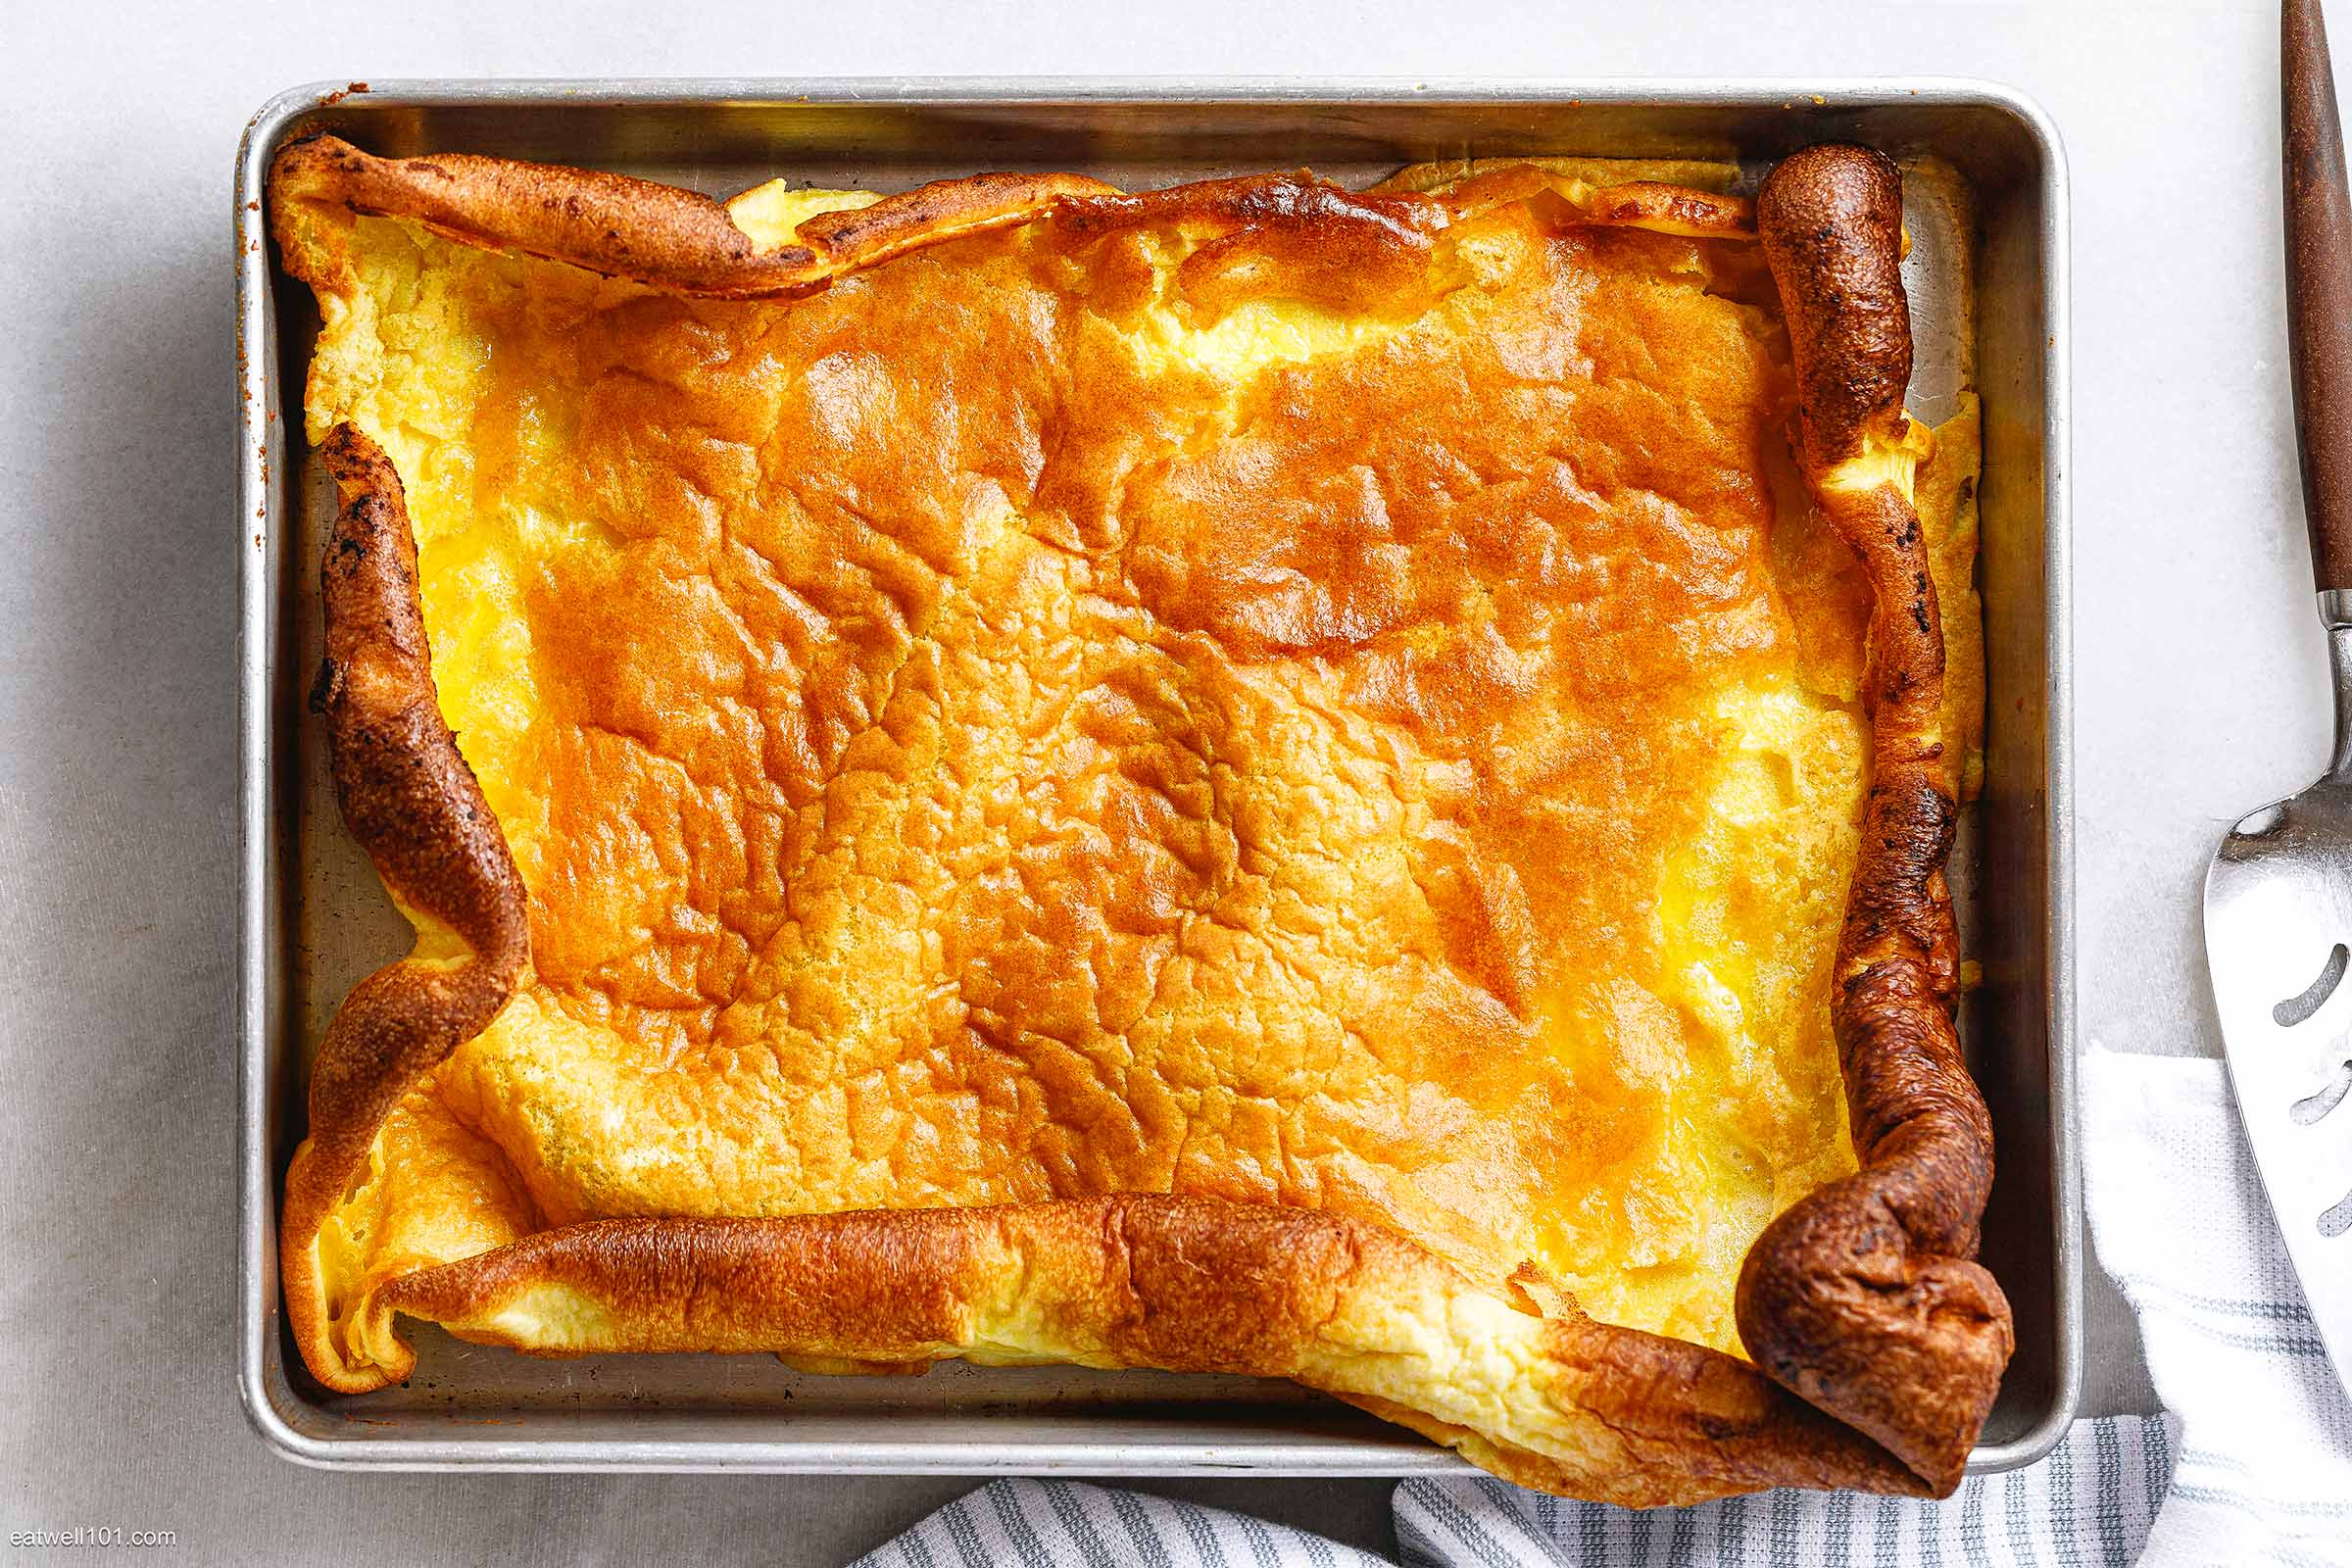
The tray method—pouring batter into a greased or parchment-lined baking tray—is my personal favorite. It gives you a large, uniform pancake that you can slice into squares. It’s efficient, bakes evenly, and lets you control the thickness by adjusting how much batter you pour. I usually go for about 1/2 inch deep for soft, fluffy texture.
Muffin tins are great when I want individual, self-contained pancakes. They’re kid-friendly, freeze well, and can be filled with extras like blueberries or chocolate chips. The only downside is that they require more greasing and a slightly thicker batter to rise well without collapsing.
Sheet pancakes—spreading a thin layer of batter over a large baking sheet—are ideal for quick cooking and making thinner pancakes. They bake fast and work well for layering or rolling. But they can dry out if you’re not careful with timing and thickness.
Each format has its place. For beginners, I recommend starting with the tray method: it’s the most forgiving, easiest to control, and delivers consistent results. Once you master that, you can experiment with muffin versions or thinner sheets based on your preferences and needs.
Choosing the Right Equipment for Oven-Baked Pancakes
The beauty of oven-baked pancakes is that you don’t need fancy tools, but using the right tray and setup can make a huge difference in texture, color, and ease of cooking. I’ve tested dozens of trays and pans, and here’s what I’ve learned through practice.
For best results, I use a metal rimmed baking tray—usually 9×13 inches or slightly larger. Metal conducts heat more evenly than glass or ceramic and helps create a lightly crisp bottom. If I want very soft pancakes with no browning underneath, I opt for a ceramic dish. For the crispiest bottom crust, I sometimes preheat the tray with butter before pouring the batter.
Always line with parchment paper or grease thoroughly. Baked pancakes are more delicate than skillet ones, especially on the bottom, and can tear if you try to lift them without proper release. I’ve ruined trays by skipping this step—it’s not worth it.
The tray should be shallow enough to allow air circulation, but deep enough to contain the batter without overflow. If you go thicker than ¾ inch of batter, increase baking time accordingly. I’ve found that ½ inch thickness gives the fluffiest texture with the least risk of raw centers.
You’ll also need a solid oven thermometer, because home ovens often lie. Mine runs 15°F hot, which completely changed my results before I realized it. An accurate reading helps maintain consistent baking times and ensures your pancake bakes evenly throughout.
Essential Ingredients for Oven Pancakes and Why Proportions Matter
The batter for oven pancakes is nearly identical to standard pancakes, but I adjust the ratios slightly for structure and moisture. Since oven heat is dry and indirect, it needs help from the inside to stay soft and rise evenly.
Here’s the base I use:
- 1 cup all-purpose flour
- 2 teaspoons baking powder
- 1/4 teaspoon salt
- 2 tablespoons sugar
- 1 cup milk (or plant-based alternative)
- 1 large egg (or 1/4 cup mashed banana/applesauce for egg-free)
- 2 tablespoons melted butter or oil
- 1/2 teaspoon vanilla extract (optional)
I increase the leavening slightly compared to skillet pancakes. The batter isn’t flipped, so the rise has to happen all at once. Too little baking powder, and the center stays flat and dense.
Sugar helps with browning, especially on top, since there’s no direct pan contact. If you want golden color, don’t skip it. Fat (butter or oil) keeps the interior moist and soft even if you slightly overbake. Without enough fat, oven pancakes dry out quickly.
Eggs help bind and lift the structure. I’ve used applesauce and banana with great success, but for these, I lower the baking temperature slightly to prevent overbrowning. The vanilla is optional, but I recommend it—it adds aromatic depth, especially when baking at 375°F or higher.
Every ingredient plays a slightly different role when baked, so don’t improvise too much your first time. Once you get a feel for how the batter behaves in the oven, you can start experimenting.
Step-by-Step Recipe for Oven-Baked Pancakes Using Tray Method
This is the exact method I use in my home kitchen and in brunch service when I need to serve many people at once. It’s reliable, simple, and results in fluffy, evenly cooked oven pancakes every time.
Preheat the oven
I set the oven to 375°F (190°C) and place the rack in the center. A fully preheated oven is crucial—starting cold means uneven rise and pale color.
Prepare the tray
I line a metal baking tray (9×13 inches) with parchment paper or grease it thoroughly with butter or oil. If I want a slightly crispy base, I preheat the tray with butter for 5 minutes before pouring in the batter.
Mix dry ingredients
In a mixing bowl, I whisk together flour, baking powder, sugar, and salt. This ensures even leavening and avoids clumps.
Mix wet ingredients
In another bowl, I whisk together milk, egg (or substitute), melted butter, and vanilla. I mix until smooth but don’t overbeat.
Combine and rest
I pour the wet into the dry and mix gently until just combined. A few lumps are fine. I let the batter rest for 5–10 minutes—this improves the rise and gives a better crumb.
Pour and bake
I pour the batter into the tray, spreading it evenly to about ½ inch thick. Then I place it in the oven and bake for 12 to 16 minutes, depending on thickness. I check at the 12-minute mark by gently pressing the center. If it springs back, it’s done.
Cool slightly and cut
Once baked, I let the tray sit for 2 minutes before slicing. This helps it set and makes slicing cleaner. I serve warm with toppings or store for later.
The result: golden, fluffy oven-baked pancakes with no flipping, no mess, and no guesswork.
Temperature and Timing Chart for Different Oven Styles and Tray Types
Getting the time and temperature right for baked pancakes is all about balance. The shape of the tray, the thickness of the batter, and even the type of oven you use will affect how quickly the pancake sets, rises, and browns. I’ve compiled this chart based on my own kitchen tests with multiple oven types and bakeware options.
| Tray Type | Oven Style | Temp (°F / °C) | Bake Time | Notes |
| Metal sheet tray | Conventional oven | 375°F / 190°C | 12–16 mins | Best balance of color and texture. |
| Ceramic baking dish | Conventional oven | 365°F / 185°C | 18–22 mins | Slower, softer bake with paler crust. |
| Glass dish | Conventional oven | 350°F / 175°C | 20–25 mins | Longer bake; great moisture retention. |
| Muffin tin | Conventional oven | 375°F / 190°C | 14–18 mins | Ideal for portioning; needs more greasing. |
| Metal tray | Convection oven | 360°F / 180°C | 10–13 mins | Reduce time slightly; color develops faster. |
When in doubt, I check doneness by pressing the center lightly. If it springs back and doesn’t feel wet, it’s done. Overbaking dries the pancake out quickly, especially in metal trays—so keep an eye on the last few minutes.
How to Get a Golden Top Without Flipping in the Oven
One of the most frequent questions I get about oven pancakes is: “How do I get that golden, appetizing top if I don’t flip them?” It’s a fair concern—because oven heat doesn’t directly touch the surface, like a skillet does. But I’ve found several simple tricks that work consistently.
First, I always include a bit of sugar or natural sweetener in the batter. Sugar helps the top caramelize slightly, especially in a hot oven. For even more color, a touch of maple syrup or honey in the batter works beautifully. I don’t overdo it—just enough to help the browning along.
Second, I sometimes brush the top with melted butter just before baking. It adds richness, but more importantly, it helps the surface cook evenly and pick up a light shine. This also prevents any dry film from forming.
If I want a deep, even golden top—especially for presentation—I turn on the broiler for the last 60–90 seconds of baking. But this step requires full attention. I never walk away while broiling because the line between “perfectly golden” and “burnt and bitter” is very thin.
Lastly, I avoid crowding the oven. If the tray is too close to the top or bottom heating elements, the browning can be uneven. I always bake in the center rack unless I’m deliberately finishing with top heat.
With these techniques, I can achieve a golden, slightly crisp surface every time—without flipping a single pancake.
Baking Pancakes in a Conventional Oven vs. Convection Oven
Baking in a conventional oven is very different from using a convection oven, and I’ve worked with both extensively. The main difference is air circulation: convection ovens have a built-in fan that circulates hot air, while conventional ovens rely on radiant heat from the top and bottom elements.
In a convection oven, heat wraps around the tray more efficiently. This means the pancakes cook faster and brown more evenly—especially the top. I usually reduce the baking temperature by 10–15°F and check 2–3 minutes earlier than I would with a conventional oven. It’s especially good for muffin-style or thicker pancakes because the internal temperature stabilizes quicker.
In a conventional oven, the baking is slightly gentler and more traditional. The bottom tends to brown first, and the top stays lighter unless you use extra sugar or finish under the broiler. Timing is less aggressive, so it’s more forgiving if you walk away for a minute or two. I use this for most of my family baking—it’s reliable and stable.
That said, I never rely on oven dials alone. My convection oven says 375°F, but an internal thermometer shows 390°F. That’s a big enough swing to overbake your pancakes. I highly recommend using an oven thermometer no matter which type you have.
Once you understand how your oven moves heat, you can time your pancakes precisely and adjust the environment for the perfect finish—whether it’s soft, crisp, golden, or rich.
How to Adapt This Method for a Microwave, Pressure Cooker, or Skillet
Although the tray method is designed for the oven, I’ve successfully adapted this same batter to the microwave, pressure cooker, and skillet—each with its own unique behavior. The results won’t be identical, but they can still be excellent if you tweak the approach.
In the microwave, I pour the same batter into a greased ceramic mug or shallow dish, filling only halfway to prevent overflow. I microwave on high for 90–120 seconds and let it rest for 1 minute afterward. It comes out fluffy and soft—more like a steamed cake than a pancake—but very satisfying. I suggest adding a touch of oil or banana to help retain moisture.
In the pressure cooker, I pour the batter into a greased heatproof mold or ramekin, cover it loosely with foil, and place it on a trivet over 1 cup of water. Cooking for 12–15 minutes on low pressure or 6–8 minutes in an electric cooker (like Instant Pot) yields very moist, thick pancakes with a tender interior. It’s perfect for dense or fruit-filled versions.
On a skillet, I use the same batter but reduce the leavening slightly for better control. The batter is thicker than standard, so I spread it gently and cook on medium heat for 2–3 minutes per side. The texture is a bit firmer and more rustic compared to the oven, but still delicious. Just make sure to flip gently and grease well to avoid sticking.
Each method has its advantages—whether it’s speed, texture, or availability. I recommend trying all three so you can choose what fits your style and kitchen best.
Common Mistakes When Baking Pancakes in the Oven
Oven baking is more forgiving than stovetop cooking, but it still has its traps. I’ve seen many enthusiastic cooks go wrong because they underestimate how batter behaves in dry, enclosed heat.
The first and most common mistake is overfilling the tray. Pouring too much batter—especially without adjusting bake time—leads to soggy centers and uneven texture. I recommend no more than ½ to ¾ inch thickness unless you’re making a very rich, cake-like variation. Too much batter in a standard tray traps steam, and instead of rising evenly, the pancake collapses or stays raw in the middle.
Another issue I often see is undermixing or overmixing the batter. Unlike skillet pancakes, where a few lumps are harmless, oven pancakes need even hydration for uniform rise. But if you overmix, the gluten develops and you get a chewy, bready result. I always stop mixing as soon as the wet and dry ingredients are combined.
Skipping the rest period is also a problem. I’ve found that letting the batter rest for 5–10 minutes allows the flour to fully absorb the liquids and the leavening agents to activate more evenly. Without this rest, the texture tends to be flat or unevenly risen.
Many cooks also forget to preheat the oven fully. Sliding a tray into a half-heated oven causes uneven setting and can lead to a flat, dense pancake. My advice: let your oven preheat for at least 10–15 minutes, and check the internal temperature with a thermometer.
Finally, a common oversight is expecting a golden top automatically. In the oven, the top doesn’t brown unless you add sugar, brush with butter, or finish under the broiler. That doesn’t mean your pancake is undercooked—it just means oven baking behaves differently than stovetop searing.
Flavoring Tips: Spices, Zests, and Extracts that Work Best Baked
One of the joys of oven-baked pancakes is how gently the flavors develop. Unlike stovetop pancakes, which can scorch delicate ingredients, oven heat is steady and indirect. That allows herbs, spices, and aromatic extracts to unfold slowly and evenly throughout the batter.
I often use warm spices like cinnamon, nutmeg, or even cardamom. They don’t just flavor the pancake—they perfume the entire kitchen. A small amount goes a long way, especially when baked. I always mix them into the dry ingredients for even distribution.
Citrus zest—particularly lemon and orange—is another favorite of mine. I finely grate it right into the wet ingredients, so the essential oils infuse the batter. In the oven, the zest doesn’t lose its brightness like it sometimes does in a skillet, and it pairs especially well with blueberry, raspberry, or vanilla-based batters.
Vanilla extract is a must. In stovetop pancakes, I sometimes find the flavor gets lost. But baked, it lingers in every bite. For a twist, I also use almond extract when I’m working with nut-based toppings or cherry compote. It adds a bakery-style aroma that really elevates the dish.
For savory pancakes, I fold in herbs like chives, parsley, or thyme, along with spices like smoked paprika or cumin. These flavors hold up beautifully in the oven and offer depth without becoming bitter or overpowering. Just be sure to keep the batter balanced—savory versions require slightly less sugar and often benefit from extra fat or cheese to stay moist.
Ultimately, baking opens up flavor possibilities that stovetop cooking can’t always handle. Once you’ve mastered the tray method, you’ll start designing flavor profiles that transform a simple baked pancake into a main event.
Sauces and Toppings That Pair Well with Oven Pancakes
Because oven-baked pancakes are softer and more uniform than skillet versions, I like to think of toppings as a way to bring contrast—whether that’s in texture, flavor, or temperature. Over the years, I’ve tested dozens of combinations, and I’ve learned that certain toppings elevate tray-baked pancakes far more than others.
First, I recommend using fruit-based sauces when the pancake is lightly sweetened or flavored with vanilla. A simple berry compote—made by simmering blueberries or raspberries with a touch of lemon and sugar—adds brightness and moisture. I often spoon it over the top before serving, still warm.
If I want to lean into richness, I’ll go with maple syrup warmed with cinnamon or even a drizzle of peanut butter thinned with hot water or oat milk. These are great for baked pancakes that include bananas or apples in the batter.
Another favorite combination is yogurt with honey. The acidity of Greek yogurt offsets the softness of the pancake, and it’s perfect when served cold against a warm slice. I’ve even used whipped ricotta with lemon zest as a spread when I want a more elegant finish.
For savory variations, I lean on crème fraîche, spiced hummus, or avocado mash. These work especially well if you’ve used herbs or spices in the batter. A baked pancake topped with a poached egg and garlic yogurt can easily become a main course.
The point is to match the topping to the style of pancake you’ve made. Tray-baked pancakes have a mild base, so bold toppings—sweet or savory—are always welcome.
Variations: Vegan, Gluten-Free, Fruit-Filled, and Savory Versions
One of the reasons I love oven-baked pancakes is how easy it is to customize them. The tray method is incredibly forgiving, and I’ve made countless variations to suit different diets, ingredients, and flavor preferences.
Vegan pancakes are simple to achieve. I replace the egg with ¼ cup mashed banana or unsweetened applesauce, and use oat or almond milk instead of dairy. To help with rise, I add a splash of vinegar to the milk—this mimics buttermilk and reacts with the baking powder to give the batter lift. I bake these slightly longer at 365°F to avoid overbrowning.
For gluten-free versions, I’ve had success with a mix of oat flour and rice flour, or using certified gluten-free all-purpose blends. These tend to bake well in the oven, though I increase the fat slightly to prevent dryness. I always let the batter rest 10–15 minutes to hydrate fully before pouring it into the tray.
Fruit-filled pancakes are one of my go-tos for brunch. I fold in fresh blueberries, chopped apples, or even pitted cherries before baking. For frozen fruit, I dust it lightly with flour to prevent it from sinking. These variations often bake slightly longer—an extra 2–3 minutes—but the result is always worth it.
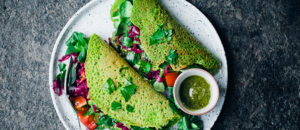
For savory tray pancakes, I reduce or omit the sugar and use ingredients like cooked spinach, grated zucchini, cumin, black pepper, or fresh herbs. I sometimes add cheese directly into the batter for richness. These are best served warm with yogurt or tahini sauce.
No matter the variation, the oven method provides consistency and space to experiment. Once you get the base technique down, the rest is just creativity.
How to Store and Reheat Oven-Baked Pancakes Without Drying Them Out
If I’m being honest, one of the best features of tray-baked pancakes is how well they store. Unlike skillet pancakes, which can become rubbery or brittle when reheated, oven pancakes hold moisture better and keep a tender crumb even days later—if stored correctly.
Once the pancake has cooled completely, I slice it into squares and separate the layers with parchment paper. I store them in an airtight container in the refrigerator for up to four days. For longer storage, I freeze them in a single layer until solid, then transfer to a sealed bag with baking paper between each piece.
When it comes to reheating, I’ve tested every method. For one or two pieces, I recommend the microwave—30 to 45 seconds on medium power works well. I sometimes wrap them in a slightly damp paper towel to preserve softness.
For the best results overall, I reheat in a 350°F (175°C) oven for 8–10 minutes. I cover the tray loosely with foil to prevent drying and sometimes add a pat of butter on top to melt during warming.
I avoid the toaster unless I want a crisp crust—because while it works, it changes the texture. It’s ideal only for thinner, firmer pieces.
When stored and reheated properly, oven pancakes taste nearly as good as fresh. I’ve served reheated slices at brunch with no complaints—just smiles.
Building Your Own Oven Pancake Routine: Timing, Variations, and Planning Ahead
Once you’ve baked pancakes in the oven a few times, something shifts—you stop thinking in terms of one-time recipes and start thinking in routines. That’s what happened to me, and it completely changed how I approach breakfast prep, especially during busy weeks.
The tray method is ideal for batch cooking. I often make a double batch on Sunday morning, slice the pancake into squares, and store portions for the next few days. Some I serve fresh, some go into the fridge, and a few I freeze for later. This is one of the rare breakfast dishes that reheats well without any texture loss, as long as you follow the moisture-retention tips I shared earlier.
I also developed a kind of rotation for weekly flavor variations. One week it’s banana cinnamon, the next it’s lemon-blueberry. When I’m preparing for a savory brunch, I lean toward herb-zucchini or cheddar-chive versions. Because the oven method is consistent, I can try different batters each week without worrying about whether they’ll cook through or flip properly. That reliability frees me to be creative.
Another thing I do is prep the dry mix ahead of time. I measure out the flour, sugar, baking powder, and salt into containers and label them “tray pancake mix.” Then, on a busy morning, all I have to do is add milk, egg or egg replacer, and melted butter. The batter comes together in three minutes, the tray bakes while I make coffee, and breakfast is ready with almost no effort.
If you want to turn this from a recipe into a habit, I recommend setting up your own system—one that fits your ingredients, schedule, and oven. Once it becomes second nature, you’ll never look at pancakes the same way again.
FAQ: Oven-Baked Pancakes — Chef Answers Your Most Common Questions
Can I use the same batter I use for skillet pancakes in the oven?
Yes, you absolutely can. I’ve done it many times. However, I usually make minor adjustments: I add a bit more baking powder for rise, and a tablespoon of extra fat (butter or oil) to prevent dryness. The oven pulls moisture from the surface more than a skillet, so balancing the ingredients helps maintain a soft, tender texture.
Why did my oven pancake come out pale on top?
That’s totally normal. The oven doesn’t apply direct heat to the top surface like a skillet does. When I want more color, I either brush the top with melted butter before baking or finish under the broiler for 1–2 minutes. I’ve also found that a bit of sugar or maple syrup in the batter helps promote gentle caramelization on top.
What’s the ideal tray size for this method?
I personally recommend a 9×13 inch metal baking tray with shallow sides—something that’s not too deep but allows the batter to spread evenly. This size ensures even heat circulation and gives the pancake enough room to rise. Anything deeper slows baking and risks an undercooked center.
How do I prevent the pancake from sticking to the tray?
Even with nonstick trays, I always grease the surface generously or use parchment paper. Skipping this step once taught me a hard lesson—oven pancakes are more delicate underneath and can tear when lifted. Parchment gives clean edges every time, and I use it almost religiously.
Can I add fruit or chocolate chips to the batter before baking?
Yes, and I recommend it. I fold them into the batter just before pouring it into the tray. For frozen fruit, I dust it lightly with flour to keep it from sinking. Blueberries, sliced bananas, or mini chocolate chips work great. Just don’t overload the batter, or it may bake unevenly.
How thick should the batter layer be in the tray?
I aim for about ½ inch thick, which gives a light, fluffy result with minimal risk of sogginess. If you go thicker, increase the baking time by a few minutes and lower the oven temperature slightly to ensure the center cooks through. I’ve tested up to ¾ inch with good results, but only with extended baking.
Is there a vegan version of this recipe that actually works?
Absolutely. I’ve made vegan oven pancakes for years. I replace the egg with ¼ cup of applesauce or mashed banana and use oat milk or soy milk instead of dairy. I also add a teaspoon of vinegar to the milk to help the rise. The texture is moist and fluffy, especially with banana.
Can I double the recipe for a larger batch?
Yes, but you’ll need a larger tray or two standard trays. I don’t recommend baking a very thick layer in one tray unless you’re going for more of a breakfast cake. I usually split the batter between two trays and bake them side by side—rotating them halfway through if needed.
How do I know when the pancake is done baking?
I press the center gently with a finger—if it springs back and doesn’t feel wet, it’s ready. You can also insert a toothpick; if it comes out clean, you’re good to go. Timing can vary depending on your oven and tray, but this test never fails me.
Why does my oven pancake dry out when I reheat it?
That usually means it was either overbaked the first time or reheated without moisture protection. I recommend covering slices with foil or a damp paper towel during reheating. I also sometimes brush the top with a little melted butter before reheating—it restores softness beautifully.
Can I freeze baked pancake squares for later?
Yes, and I do it all the time. I let them cool fully, layer them between sheets of parchment paper, and store them in a freezer bag. They reheat best in the oven at 350°F for 8–10 minutes. They taste nearly as good as fresh—sometimes even better with toppings.
Should I adjust baking temperature in a convection oven?
Yes, I lower the temperature by about 15°F compared to a conventional oven and check 2–3 minutes earlier. Convection ovens circulate air more aggressively, which helps browning but can dry things out faster. I’ve burned the edges before by forgetting this—so now I always adjust.
Can I use muffin tins instead of a tray?
Definitely. I grease each cavity well and fill them ¾ full. They puff up beautifully and are easy to portion. I bake them at 375°F for about 14–18 minutes. I’ve found this method especially useful for packed lunches or kid-friendly breakfasts.
What toppings go best with oven-baked pancakes?
Because oven pancakes are soft and uniform, I love pairing them with contrast: berry compote, Greek yogurt, whipped ricotta, maple syrup with cinnamon, or even nut butter thinned with a splash of oat milk. For savory versions, garlic yogurt or tahini works like a dream.
What’s your personal favorite version of this dish?
I keep coming back to a lemon-zest pancake with vanilla in the batter, baked in a tray, and topped with warm raspberry sauce and a dollop of yogurt. It’s light, fragrant, and balanced. I’ve served it at brunch and even plated it as a dessert. The tray method makes it easy every time.


Post Comment