What Heat to Cook Pancakes

What Heat to Cook Pancakes: Low, Medium or High? Tips for Perfect Texture
Over the years as a chef, I’ve come to believe that the single most overlooked detail in cooking pancakes is heat. I’ve watched home cooks ruin perfect batter by using the wrong temperature—either charring the outside while leaving the inside raw, or ending up with pale, rubbery pancakes that never quite rise. Heat isn’t just about cooking; it’s about controlling texture, browning, and moisture.
- Why Heat Control Matters in Pancake Cooking
- Understanding How Pancake Batter Reacts to Heat
- The Science of Low, Medium, and High Heat Cooking
- Choosing the Right Heat Setting Based on Your Equipment
- Essential Ingredients for Proper Pancake Cooking
- Step-by-Step Pancake Recipe with Emphasis on Heat Control
- Ideal Temperature Chart for Cooking Pancakes (All Methods)
- How to Cook Pancakes on a Skillet: Heat Management Tips
- Baking Pancakes in the Oven: Timing and Temperature Guide
- Making Pancakes in a Microwave: Adjusting Time and Power
- Pressure Cooker Pancakes: Moisture, Pressure, and Heat Levels
- Common Mistakes with Heat Settings and How to Avoid Them
- Seasonings That React Well to Different Heat Levels
- Best Sauces and Toppings for Pancakes Cooked at Various Heats
- Recipe Variations: Thin, Thick, Vegan, and Buttermilk Pancakes
- My Proven Tips for Mastering Pancake Heat
- FAQ: 15 Questions About Pancake Heat Settings — Answered by a Chef
Why Heat Control Matters in Pancake Cooking
This article is my complete guide for mastering heat in pancake making. I’ll explain the differences between low, medium, and high heat, and show you when and how to use each one. I’ll walk you through my own tested temperature ranges, cooking tools, and tricks that have worked for me in home kitchens and commercial service alike. Whether you’re flipping your first pancake or fine-tuning a family recipe, heat control will be your secret weapon.
Understanding How Pancake Batter Reacts to Heat
The moment pancake batter hits a hot surface, a chemical and physical transformation begins. I’ve seen people assume it’s a simple matter of “just cook it until it’s brown,” but in reality, each level of heat creates a different type of pancake.
At low heat, the batter spreads slowly. It takes longer to cook through, resulting in a flatter, denser pancake. You get a pale exterior and a soft, almost steamed texture inside. This can work if you’re going for a crepe-like style or thinner pancakes, but I’ve found that too low a temperature tends to sap energy from the leavening agents, leading to less lift.
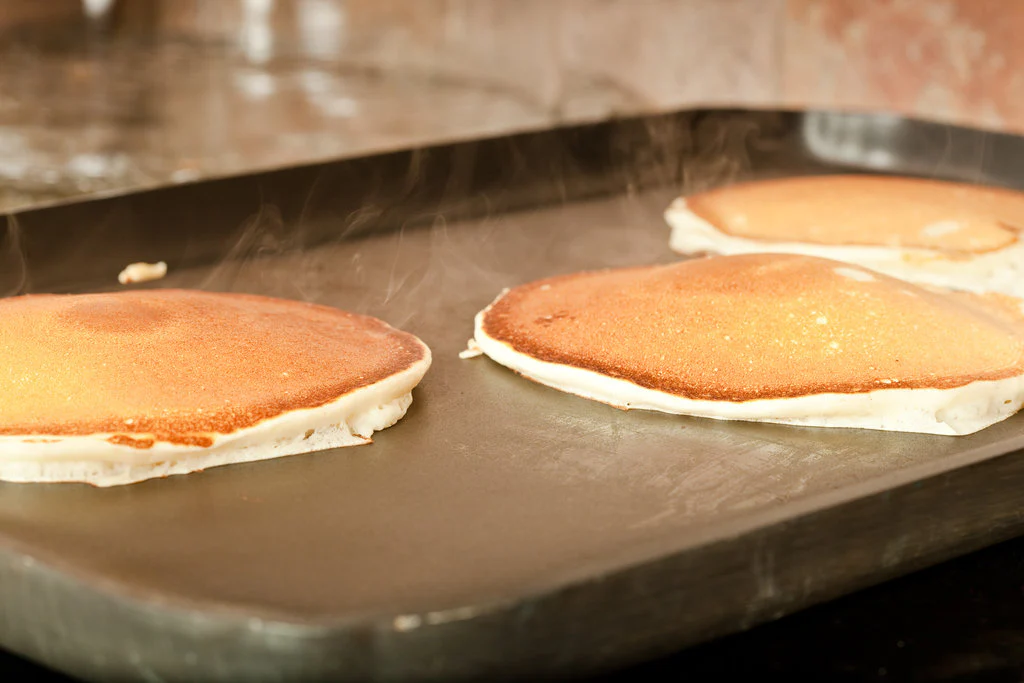
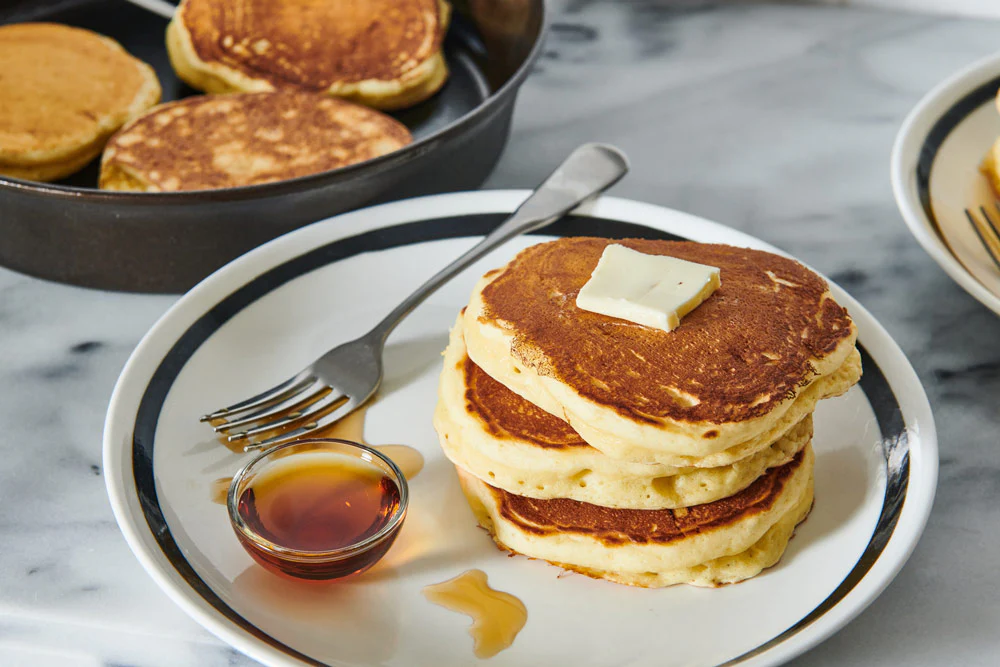
Medium heat is where the magic happens. The Maillard reaction kicks in at around 300°F (150°C), which is where pancakes start to brown and develop that rich, toasty crust. The outside crisps up just enough to provide structure, while the inside remains light and fluffy. I always aim for this range unless I’m doing something very specific.
High heat, on the other hand, is unforgiving. I’ve watched pancakes burn in under a minute on a griddle that was too hot. The batter cooks too fast, creating a tough crust and an undercooked center. You lose the ability to correct mistakes, and flipping becomes difficult without tearing.
That’s why knowing how your batter responds to different heats is essential. Eggs, milk, flour, and sugar all react differently depending on temperature, and even the thickness of the batter plays a role. Understanding this lets you make adjustments on the fly—and that’s what separates average pancakes from truly great ones.
The Science of Low, Medium, and High Heat Cooking
Let’s break it down further, from a chef’s perspective. I treat heat in three distinct zones: low (250°F–300°F), medium (320°F–350°F), and high (375°F and up). Each one serves a purpose, but only one consistently delivers the results most home cooks want.
Low heat is around 250°F to 300°F (120–150°C). I use it when I want gentle cooking for very delicate batters—like ones made with almond flour, oat flour, or thin crepe-style recipes. It prevents scorching, but it also limits caramelization. Great for very moist, thin pancakes that you don’t mind staying pale.
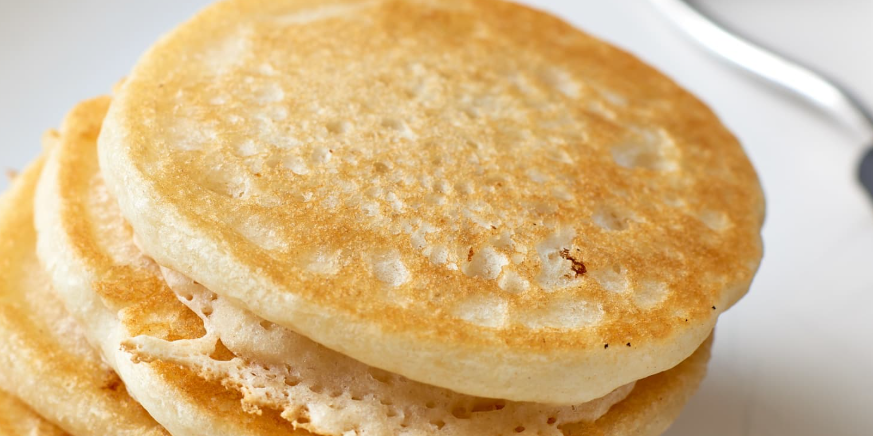
Medium heat—this is the golden zone. At 320°F to 350°F (160–175°C), your pancake will brown beautifully without burning. The interior cooks through at the same rate the outside browns, creating an even crumb and perfect flip. This is where I keep my griddle or skillet most of the time. I’ve tested it with dozens of recipes, and it’s always the safest and most reliable range.
High heat—anything from 375°F (190°C) and above—can be useful in very short bursts, like finishing a pancake with crisp edges or searing a side. But I almost never start pancakes at this temperature. The risk of overcooking or uneven texture is too high. I only use it if I’m doing something specific, like a thin, fast-cooked pancake or trying to mimic diner-style crust.
Once you understand these zones, you’ll start to feel the batter’s rhythm. Pancakes don’t lie—they’ll tell you, with their bubbles, color, and texture, exactly what temperature you’re using. All you have to do is listen.
Choosing the Right Heat Setting Based on Your Equipment
Not all pans and appliances conduct heat the same way. One of the most important lessons I’ve learned as a chef is that the same medium heat on one stove may act like high on another. That’s why I always recommend getting to know your equipment—and adjusting accordingly.
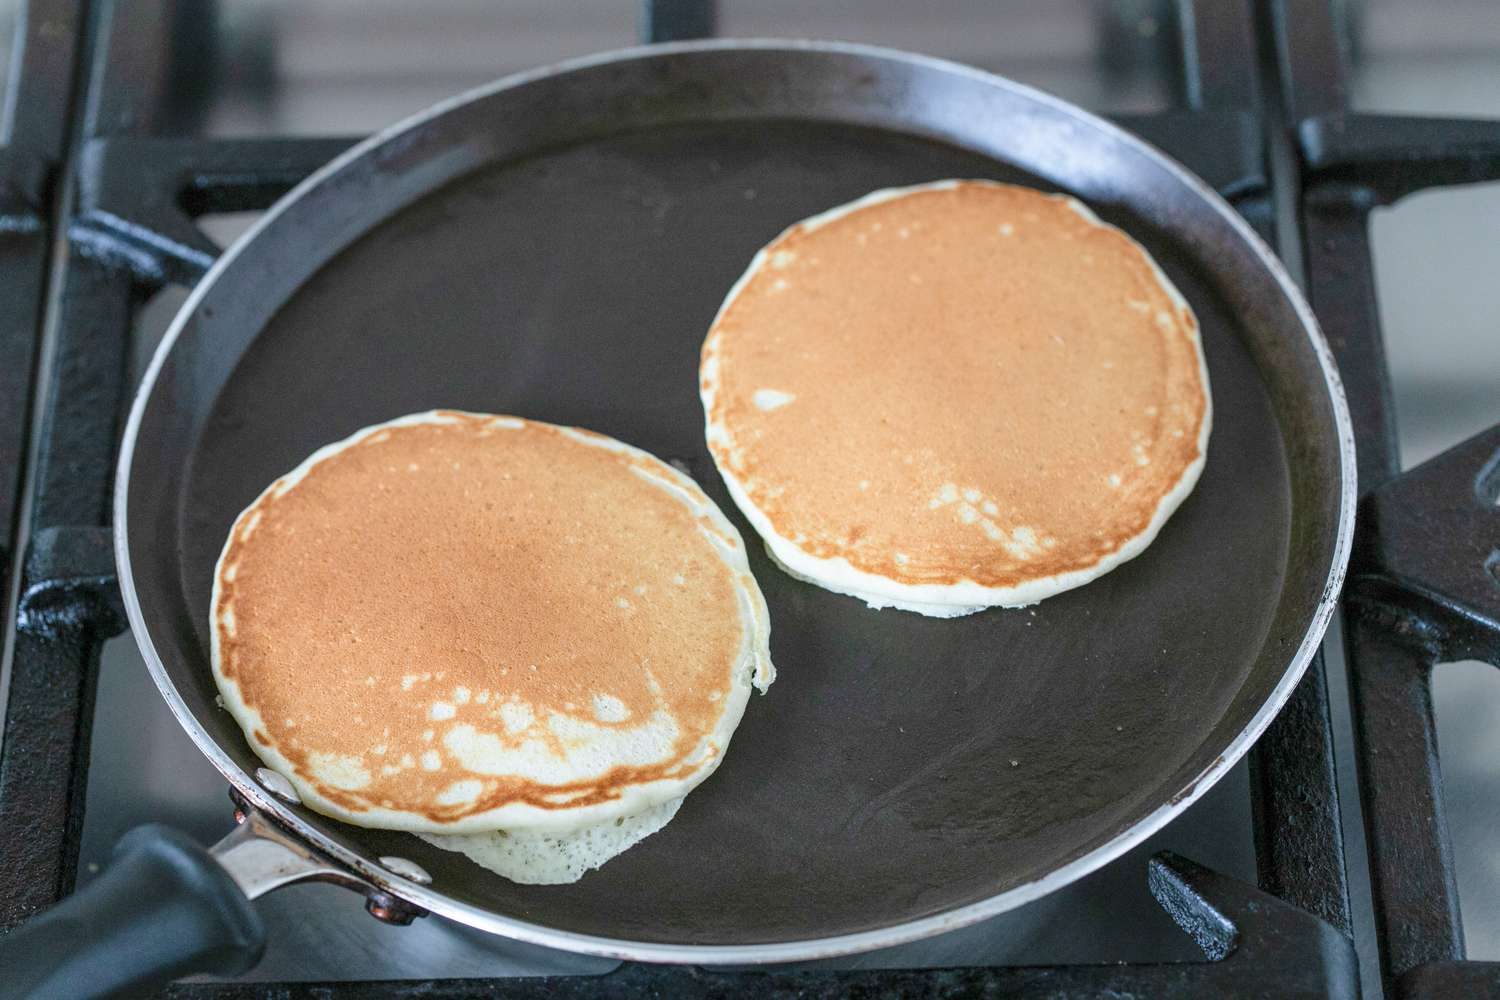
With a nonstick skillet, heat builds quickly and retains fairly evenly. I usually start these pans on medium and then lower slightly once the first pancake is done. If the surface starts to smoke or your pancake browns before bubbling, that’s a sign you’re going too hot. A drop of water that dances and vanishes in 1–2 seconds is my go-to test.
Cast iron is a different beast. It holds heat longer and needs more time to preheat—up to 5–7 minutes. Once it’s hot, I drop the flame to medium-low. Cast iron is amazing for crisp edges and even cooking, but it punishes mistakes. I always grease it properly and don’t rush the flip.
Electric griddles are my personal favorite when consistency matters. Most models have adjustable thermostats. I set mine to 340°F (170°C) for most recipes and only tweak it if I see uneven coloring. For beginners, it’s one of the easiest ways to learn heat control.
Gas stoves respond quickly but require more active management. I recommend starting on medium, observing how the first pancake cooks, and then adjusting slightly up or down depending on the results. Watch how the pancake spreads and how fast the bottom browns—this gives you real-time feedback.
Understanding your tools is just as crucial as understanding your batter. The more you cook with the same pan or griddle, the more second nature temperature control becomes. Trust me—your pancakes will show the difference.
Essential Ingredients for Proper Pancake Cooking
When working with controlled heat, the balance of ingredients becomes even more important. A well-behaved batter reacts to heat predictably. But the wrong proportions can throw everything off, especially when you’re relying on precise browning and moisture retention.
Here’s the standard base I work with in professional kitchens:
- 1 cup all-purpose flour
- 1 tablespoon sugar
- 1/4 teaspoon salt
- 1 tablespoon baking powder
- 1 cup milk (dairy or plant-based)
- 1 egg (or 1/4 cup applesauce or mashed banana for egg-free)
- 2 tablespoons melted butter or neutral oil
- 1/2 teaspoon vanilla extract (optional)
The flour provides structure, and using all-purpose keeps it soft but stable. Sugar is essential not just for flavor but for browning. I’ve tested sugar-free versions, and they rarely develop that golden crust unless other ingredients like banana or syrup are added. Baking powder delivers the lift, but it only works properly when the heat is balanced—too hot, and the outside sets before the rise happens.
Fat (butter or oil) helps create a tender crumb and prevents sticking. Without it, the batter dries out fast under high heat. Milk adds moisture and activates the leavening. And eggs (or substitutes) bind the batter and affect browning.
The key to cooking this batter well is watching how the sugar and proteins react to heat. If the batter has too much sugar or fruit, I lower the heat slightly to prevent burning. If it’s very lean (like a protein-heavy version), I increase the fat or moisture to keep it tender under the heat.
Step-by-Step Pancake Recipe with Emphasis on Heat Control
This is my core recipe for controlled, consistent pancakes—written as I’d teach it in a class, with heat as the star of the process. Yield: about 6 medium pancakes.
Preheat your pan
Place your skillet or griddle over medium heat. Give it 3–5 minutes to stabilize. I always use the water drop test—if the droplets dance and evaporate, the surface is ready. Don’t start cooking too early; under-heated pans lead to spread-out, pale pancakes.
Mix the dry ingredients
In a large bowl, whisk together flour, sugar, salt, and baking powder. Make sure everything is evenly distributed—especially the leavening. Clumps of baking powder can cause uneven rise when exposed to sudden heat.
Mix the wet ingredients
In another bowl, combine milk, egg (or substitute), melted butter, and vanilla extract. Stir until smooth. I avoid overmixing at this stage to keep the batter light.
Combine wet and dry
Pour the wet into the dry and stir just until combined. A few lumps are fine. I let the batter rest for 5–10 minutes to allow the baking powder to activate and the gluten to relax—this creates a better texture when it hits the pan.
Cook the first pancake
Grease the pan lightly. Pour 1/4 cup of batter into the center. I let it cook undisturbed for 2–3 minutes. If the edges start to dry and bubbles form across the surface, I know the underside is ready. I flip gently and cook the other side for 1–2 minutes.
Adjust and repeat
The first pancake is the test run. If it browns too quickly, I lower the heat. If it stays pale too long, I raise it slightly. This is how I dial in the perfect setting.
Once the rhythm is set, I cook the remaining pancakes in the same pattern, stacking them gently with a clean towel over top to keep them warm and soft. The key throughout is not just the recipe—it’s the way you listen to your pan.
Ideal Temperature Chart for Cooking Pancakes (All Methods)
Through years of testing in kitchens both professional and at home, I’ve created a reliable temperature guide that covers every method of pancake cooking. Whether you’re using a skillet, oven, microwave, or pressure cooker, this table is the reference I personally use to avoid guesswork and ensure consistency.
| Cooking Method | Ideal Temp (°F / °C) | Time per Side / Batch | Notes |
| Skillet or Griddle | 325–350°F / 160–175°C | 2–3 min per side | Medium heat works best; adjust after first pancake. |
| Oven (baked pancakes) | 375°F / 190°C | 10–15 min total | Great for batch cooking or thick batter; use parchment or grease well. |
| Microwave | High (900W–1000W) | 90–120 seconds | For mug/bowl pancakes; rest 1 min before eating. |
| Pressure Cooker | Medium-Low Flame | 12–15 minutes (steamed) | Add 1 cup water; use trivet and covered mold for best results. |
| Electric Griddle | 340°F / 170°C | 2–3 min per side | Preheat fully; do not oil the surface unless manufacturer recommends it. |
I always recommend starting with medium heat, then observing how your first pancake cooks. The signs are in the bubbles, the browning, and the rise. If you pay attention here, you’ll never need to guess again.
How to Cook Pancakes on a Skillet: Heat Management Tips
The skillet is where most home cooks start, and rightly so—it’s versatile, easy to control, and reacts quickly to heat adjustments. But it also punishes inattention. I’ve seen beautiful batter ruined by an impatient cook who flipped too early or cranked the flame too high.
First, choose the right pan. I use a thick-bottomed nonstick skillet or cast iron. I preheat it for 3–5 minutes over medium heat. A drop of water should skitter across the surface and evaporate in under 2 seconds—that’s your cue the pan is ready.
Before pouring the batter, I wipe a thin layer of oil or butter across the surface. If your pan is truly nonstick, you don’t need much. I pour 1/4 cup of batter per pancake, letting it spread naturally. I don’t touch it for the first 2–3 minutes.
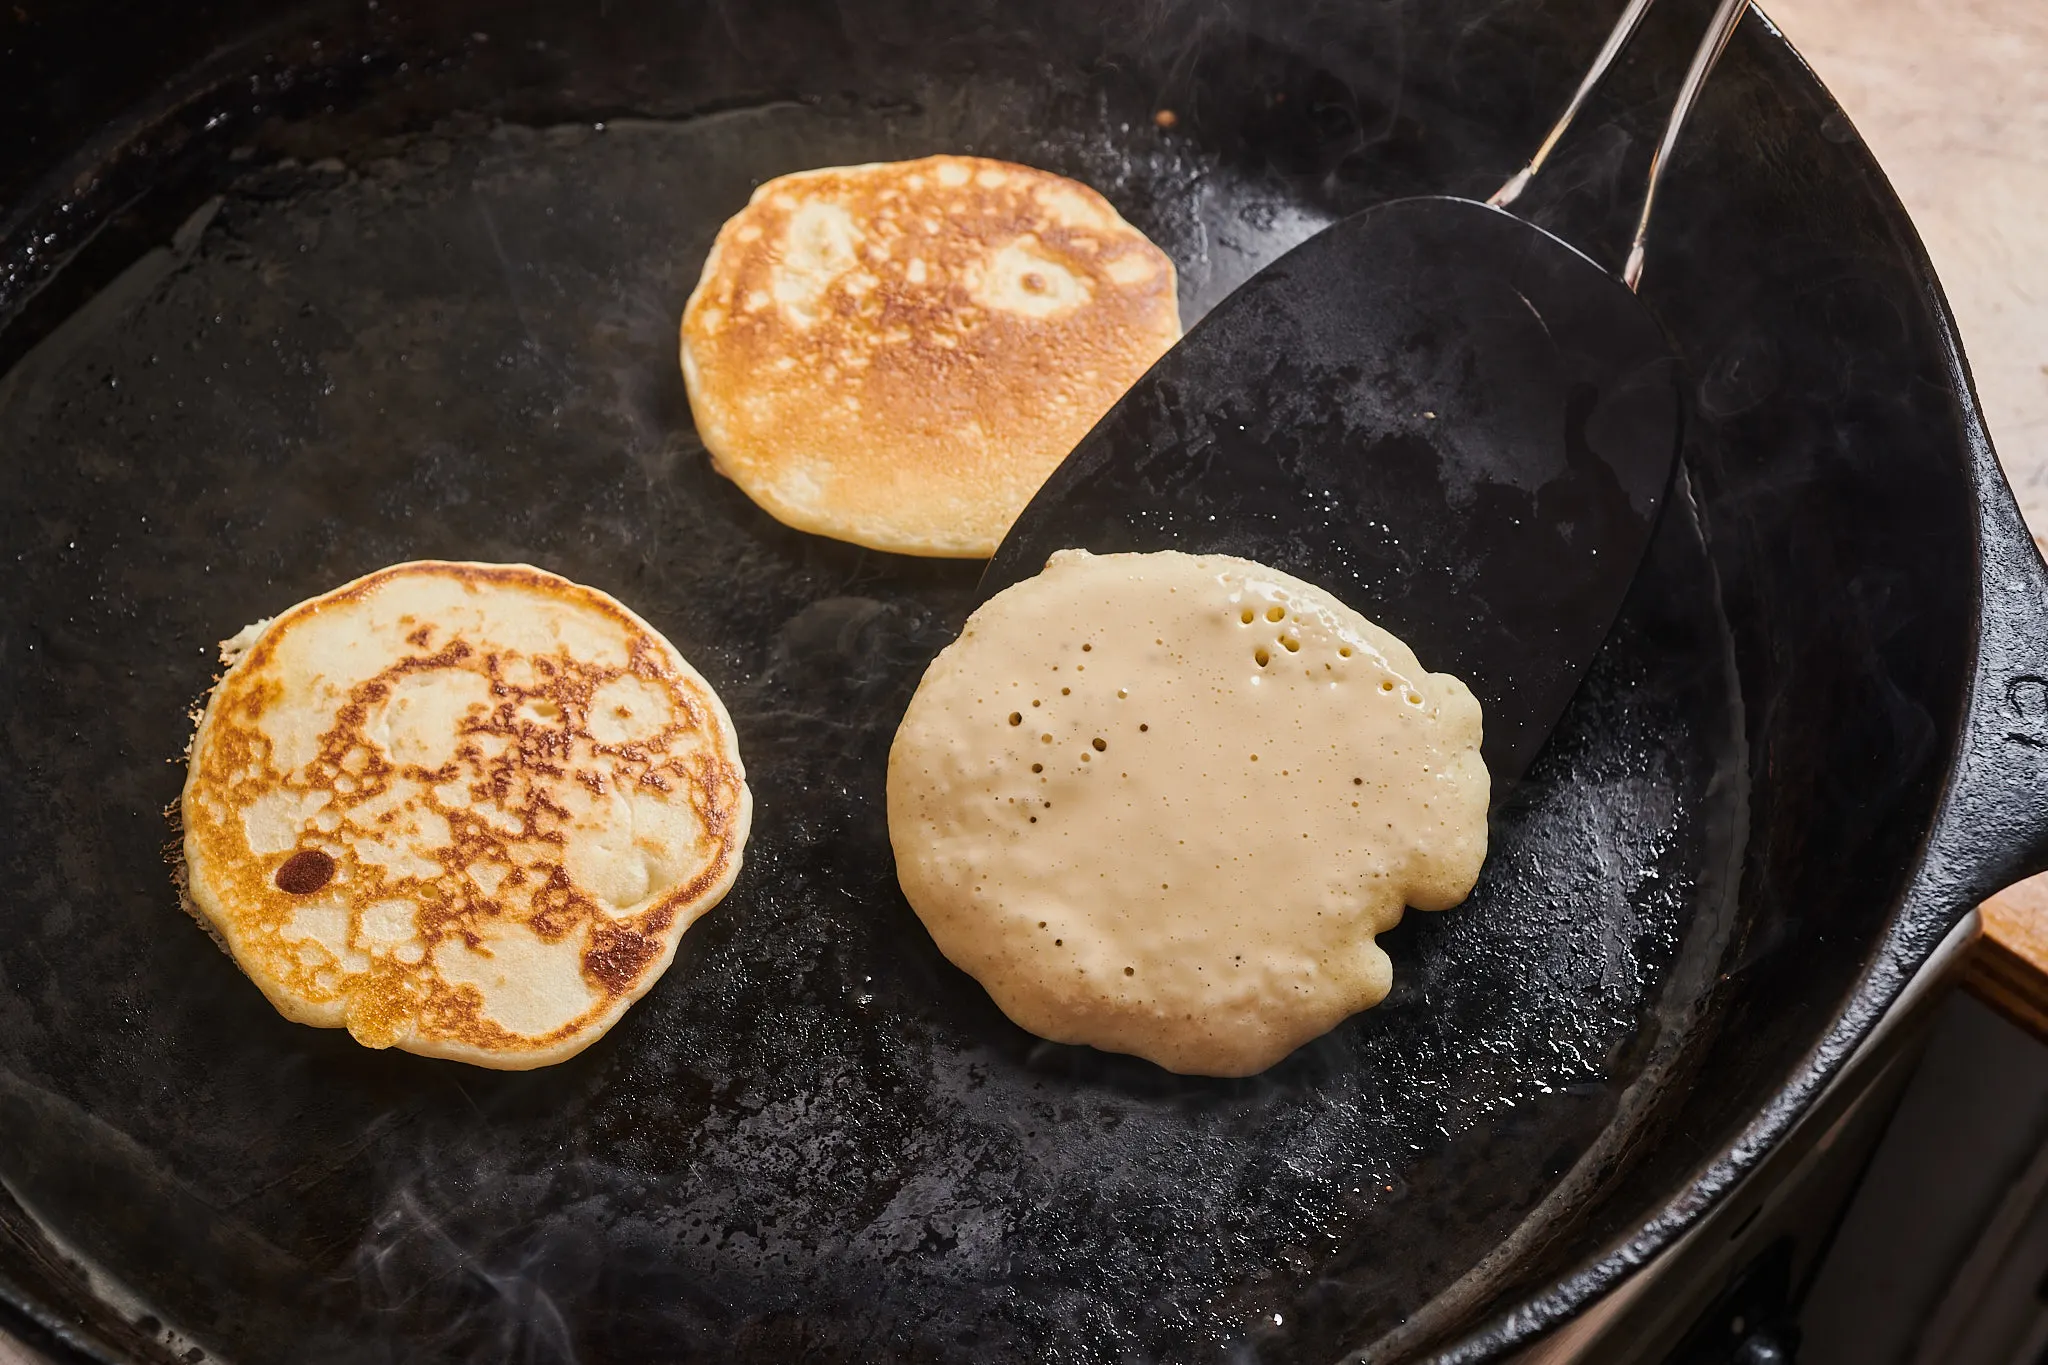
You’ll start to see small bubbles form. When those bubbles reach the center and the edges begin to firm up, I carefully slide a spatula underneath. I check the underside for a golden brown crust before flipping.
I’ve learned to trust the sound and smell. If the pancake hisses too loudly or starts smoking, the heat is too high. I reduce the burner by a notch and wait 30 seconds before continuing.
I repeat the process, adjusting only slightly if I notice variations in color or thickness. Skillet pancakes are all about rhythm. Once you find it, the results are better than any mix or diner short stack.
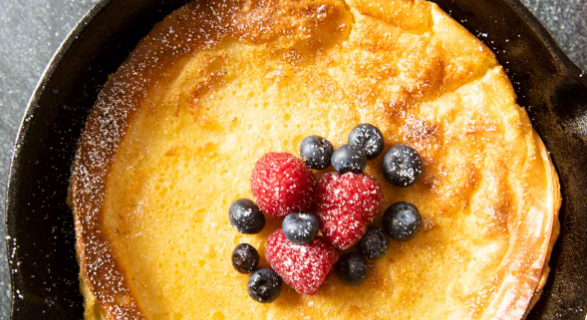
Baking Pancakes in the Oven: Timing and Temperature Guide
I turn to the oven when I want uniformity, efficiency, or when I’m cooking for a group. Baking pancakes eliminates the need to monitor individual flips and makes the heat control simpler—but no less important.
I begin by preheating the oven to 375°F (190°C). I line a baking sheet with parchment paper or lightly grease a shallow casserole dish. I pour the batter into the dish to a depth of about half an inch—any thicker and you risk a soggy center.
Baked pancakes need 10 to 15 minutes to rise and set. I’ve found that rotating the tray at the halfway point helps with even cooking, especially if your oven has hot spots. If I’m baking a sheet of small, separate pancakes (using molds or rings), I watch the edges—they should lift slightly and turn golden.
I usually press the center gently with a fingertip around the 12-minute mark. If it springs back, it’s ready. If it feels wet or leaves an imprint, I give it another 2–3 minutes. You won’t get the crisp browning of a skillet, but the texture is beautifully soft and spongy—especially if you let the batter rest before baking.
To boost color on top, I sometimes switch the broiler on for the last minute—but you must watch closely. The moment sugar starts to caramelize, it can go from golden to burnt in seconds. Oven pancakes are a dream for batch prepping, and they freeze well, too.
Making Pancakes in a Microwave: Adjusting Time and Power
Microwave pancakes may not be traditional, but they’ve saved me more than once—especially in small kitchens or hotel rooms with no stove. When I first started experimenting with microwaved batter, I was skeptical. But with a few tweaks, I got results that were soft, evenly cooked, and surprisingly satisfying.
The trick is containment. In the microwave, batter doesn’t spread—it rises. I use a wide mug, ramekin, or shallow microwave-safe bowl and fill it only halfway. Too full, and it overflows or cooks unevenly. I grease the sides lightly, even with nonstick containers.
I cook at full power (usually 900W–1000W) for 90 to 120 seconds. I start with 90, check the center, and add 10–15 seconds if needed. The texture should be sponge-like, not rubbery. If it’s dry or bouncy, you’ve gone too long.
Microwave cooking removes the browning element, but the moisture is excellent. For better results, I rest the batter for 5–10 minutes before microwaving. This gives the leavening time to activate, which improves texture. Also, I let the finished pancake rest for 1 minute in the container—it finishes cooking in its own heat and firms up slightly.
It’s a perfect solution for fast breakfasts, late-night snacks, or kids learning to cook. Not glamorous—but practical, and very customizable.
Pressure Cooker Pancakes: Moisture, Pressure, and Heat Levels
Cooking pancakes in a pressure cooker might sound strange, but I’ve used this method often in vegan kitchens and compact spaces. It creates moist, cake-like pancakes that resemble steamed bread—perfect for denser batters or when you want something truly soft and fluffy.
I start by preparing a thicker-than-usual batter. If it’s too runny, it won’t hold shape during steaming. I grease a small metal or silicone container, pour in the batter to about halfway, and cover it loosely with foil or a lid. This prevents condensation from dripping in and making the top soggy.
In the pressure cooker, I place a trivet or rack at the bottom and add 1 cup of water. I lower the container onto the trivet, seal the lid, and cook on medium-low heat for 12–15 minutes. In an Instant Pot or similar electric pressure cooker, I use high pressure for 6–8 minutes and natural release.
The result is soft, pale, and very moist. It won’t have a crust, but it’s ideal for slicing, topping with syrup or fruit, or using as a warm dessert base. I often add cinnamon or mashed banana to enrich the flavor, since the gentle cooking preserves subtle notes better than high-heat frying.
I recommend this method to anyone looking for a hands-off approach with guaranteed tenderness.
Common Mistakes with Heat Settings and How to Avoid Them
Every cook has burned a pancake at least once—myself included. Understanding heat is one thing, but applying it correctly is where most mistakes happen. Let me walk you through the most common ones I’ve seen and made.
First, starting with a cold or unevenly heated pan is a recipe for disaster. The batter spreads too far and sticks before it sets. I always preheat the pan for at least 3 minutes and test with a water droplet. If it dances and evaporates in 1–2 seconds, I know it’s ready.
Second, using too high a heat from the start is another classic error. The pancake browns too fast, but the interior stays raw. When this happens, flipping it often tears the bottom. I always start on medium and adjust only after cooking the first pancake as a test.
Overcrowding the pan is another mistake. It lowers the overall surface temperature, especially on electric cooktops. Each pancake ends up cooking slower, and often unevenly. I stick to 2–3 at a time, depending on the pan size.
Flipping too early is a big one. If you don’t wait for enough bubbles or the edges to firm up, you’ll get a raw, shapeless mess. I always lift one corner gently to check for browning—if it’s golden and the top looks mostly set, it’s time.
Finally, not adjusting heat after the first batch can lead to surprises. Pans hold residual heat. I often lower the heat slightly after each batch or let the pan rest for a minute if it’s getting too hot.
Mastering heat isn’t about perfection—it’s about noticing, responding, and learning with every pancake.
Seasonings That React Well to Different Heat Levels
When it comes to seasoning pancakes, I think of it not just in terms of flavor but in terms of how those flavors behave under heat. Some ingredients bloom and deepen, others burn or lose intensity. Over the years, I’ve learned which to use at low, medium, and high heat—and when to add them.
At low heat, I like to work with delicate ingredients like lemon zest, lavender, or finely chopped fresh herbs. They retain their brightness and don’t scorch. If I’m doing a savory pancake with basil or dill, I fold it directly into the batter and cook gently so the herbs stay aromatic rather than bitter.
Medium heat is where warming spices shine. Cinnamon, nutmeg, cardamom, and vanilla extract all develop deeper notes without burning. I typically add them directly to the dry ingredients so they disperse evenly. At this level, chocolate chips and dried fruit also hold up well—they soften without melting or burning.
High heat, though risky, can bring out toasty flavors in spices like clove or ginger—but only in small amounts. I’ve had cinnamon turn acrid under too much heat, so I now use it sparingly if I know I’ll be pushing the browning. In these cases, I sometimes add spices post-cooking—mixed into butter or syrup instead of the batter.
Ultimately, heat influences not just texture but taste. The same pancake batter seasoned differently—and cooked at varying heats—can taste like an entirely new recipe. Once I started thinking about seasoning in this way, my recipes became more layered and expressive.
Best Sauces and Toppings for Pancakes Cooked at Various Heats
Sauces aren’t just an afterthought—they complete the pancake. But not every topping works with every texture. The heat level you cook at determines the final feel of your pancake, and your sauce should complement that.
Low-heat pancakes tend to be soft, pale, and delicate. I pair these with brighter or fruit-forward sauces—like citrus syrup, berry compote, or lightly sweetened yogurt. These toppings highlight the tenderness and prevent everything from feeling too heavy.
Medium-heat pancakes have the most versatility. Their golden crust and fluffy interior can stand up to richer toppings. Maple syrup, nut butters, whipped cream, or caramelized fruit work beautifully here. I often sauté banana slices with brown sugar and cinnamon to top these—especially if there’s vanilla or spice in the batter.
High-heat pancakes, which often have a thicker crust and more intense browning, benefit from creamy or moist toppings that balance their slightly dry exterior. I’ve had great results with coconut cream, melted chocolate, or even a quick custard drizzle. These toppings soften the texture and amplify the richness.
I also adjust syrup temperature based on the pancake. Warm syrup on a hot, fluffy pancake is comforting. But I’ve found that chilled or room temperature toppings work better with thin or steamed pancakes where the contrast in temperature adds complexity.
As a rule, I think of sauce not as decoration but as a finishing technique—like plating a composed dish. It should complement the heat-driven texture of the pancake and highlight the flavors you built in the batter.
Recipe Variations: Thin, Thick, Vegan, and Buttermilk Pancakes
Heat plays a massive role in the success of specific pancake styles. I’ve learned this the hard way—watching beautiful buttermilk batters burn, or vegan ones collapse under too little heat. Each variation demands a different approach, and matching heat to style is crucial.
Thin pancakes or crêpes need low to medium heat. I spread the batter thin, let it set slowly, and flip carefully. Too much heat and they become brittle or burn at the edges. I often reduce the sugar here and increase fat, which keeps them flexible and easy to roll.
Thick, fluffy pancakes, especially buttermilk-based ones, require consistent medium heat. The acid in the buttermilk reacts with baking soda to create lift, but that process is delicate. If the heat is too high, the pancake crust sets before it has time to rise. I often lower the heat slightly after the first flip to finish cooking through without burning.
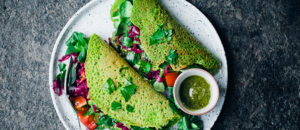
Vegan pancakes, especially those using fruit or flaxseed, need more gentle heat and longer cooking times. These batters are often denser and more prone to sticking. I cook them over medium-low and flip only when the surface is fully bubbled and firm. A nonstick surface is essential here.
Savory pancakes, such as those made with chickpea flour or whole grains, can withstand higher heat, but I usually add more oil to the batter to prevent dryness. The flavor deepens nicely with a little browning, but you have to watch closely to avoid bitterness.
Each variation speaks its own language—and heat is how you translate that into texture. Once you understand the relationship between style and temperature, you’ll stop needing recipes and start cooking by instinct.
My Proven Tips for Mastering Pancake Heat
After decades of cooking pancakes in all kinds of kitchens—from high-end restaurants to camper stoves—I can tell you this with certainty: temperature is everything. It’s not an afterthought. It’s the key to texture, flavor, and consistency.
If I could give you one piece of advice, it would be to learn your pan. Cook one pancake at a time in the beginning. Watch how it spreads, how it bubbles, how it browns. Adjust the heat slightly and try again. Within a few rounds, your hands and eyes will start to recognize the signs. That’s how I learned—and how I still cook today.
Don’t be afraid to test and tweak. Use medium heat as your default, but trust your batter and your tools. Some days the pan runs hotter. Some ingredients brown faster. Pancake making is about responsiveness and rhythm.
Most importantly, don’t rush. Good pancakes need just the right amount of patience—and the right amount of heat.
FAQ: 15 Questions About Pancake Heat Settings — Answered by a Chef
What’s the best heat setting to start with when cooking pancakes?
I always start with medium heat—about 325°F to 350°F. It gives the pancake enough time to rise and set before the outside browns. I’ve found this range to be the sweet spot for nearly all recipes, whether classic, vegan, or whole grain.
Why do my pancakes burn on the outside but stay raw inside?
That usually means your heat is too high. I’ve made that mistake often in early mornings when the pan’s hotter than it feels. I recommend lowering the heat and giving each side more time—especially if your batter is thick or rich in sugar.
How do I know when the pan is the right temperature?
I do the water drop test: if a drop of water dances on the surface and vanishes within 1–2 seconds, the pan is ready. Over time, you’ll also hear it—the right sizzle when the batter hits the pan is unmistakable. That’s something I rely on every day.
Should I preheat the pan before cooking pancakes?
Yes, absolutely. Pancakes need a steady cooking surface. I preheat for 3–5 minutes and always do a test pancake first. That first one tells me everything I need to know about whether my heat is right.
Can I cook pancakes on low heat if I’m worried about burning them?
You can—but they’ll be paler, denser, and may not rise as well. I’ve done this when making very moist or sweet pancakes, but it’s a trade-off. Medium heat is safer if you want a good balance of rise and color.
Is high heat ever appropriate for pancakes?
Only in very specific cases. I sometimes use high heat at the end of cooking to crisp the edges or finish quickly. But I never start pancakes at high heat—it sets the outside too fast and ruins the texture inside.
Why do my pancakes cook unevenly across the pan?
Uneven heating is often due to pan type or burner size. I had this problem on gas ranges with small burners. You can rotate the pan slightly as you cook or use a heavy-bottomed skillet to help distribute heat more evenly.
Should I change the heat after the first pancake?
Often, yes. Pans retain heat, so if the first pancake looks too dark, I turn the heat down a bit. If it’s too pale, I bump it up. Every first pancake is a test run—don’t judge the whole batch by it.
What heat setting should I use for thick pancakes?
Medium or even medium-low, depending on the thickness. I’ve found that thicker batters need more time to cook through, so a slightly gentler heat allows that without overbrowning the surface.
Do different flours need different heat levels?
Yes. Whole wheat and oat flour tend to brown faster and hold more moisture, so I reduce the heat slightly. Gluten-free flours sometimes need a little more time to set, so I cook them longer at medium-low.
Can I use an infrared thermometer to check skillet heat?
Absolutely. I’ve used one for years. It helps take the guesswork out, especially when switching pans. I aim for 325°F–350°F directly on the surface before adding batter.
Why do pancakes stick to the pan even when the heat is right?
This usually means the pan wasn’t greased well or it isn’t truly nonstick. I always use a little butter or oil and spread it evenly. Also, if the pancake is flipped too early, it can tear and stick.
How does heat affect the color of pancakes?
The Maillard reaction—the browning—happens around 300°F. That golden color depends on both sugar and protein in the batter reacting to heat. If your pancakes stay pale, your pan probably isn’t hot enough.
Can I cook pancakes in advance and reheat them later?
Yes, and I do it often for events. I store them between parchment sheets and reheat them in a 300°F oven for 8–10 minutes. Microwaving works too, but may soften the texture. The key is gentle reheating.
What’s your personal trick for perfect pancake heat control?
I trust my eyes, ears, and nose. After so many batches, you start to notice how pancakes “speak”—they hiss gently when the heat is right, they bubble in a certain pattern, they smell toasted but not burnt. That awareness is more powerful than any thermometer.

Post Comment